10 Essential Tips for Using Silicone Rubber for Mold Making?
When it comes to silicone rubber for mold making, experience is key. Industry expert John Smith has stated, “Mastering silicone rubber techniques can unlock endless creative possibilities.” This highlights the critical importance of understanding the material thoroughly.
Silicone rubber is versatile, but it can be tricky to use effectively. Not all silicones are created equal; the right choice can significantly impact your project. You must consider factors like curing time and hardness. Even professionals occasionally overlook these aspects, leading to project setbacks.
In mold making, attention to detail is essential. Every step, from mixing to pouring, can influence the final product. Achieving the desired results often requires multiple attempts. Embrace the learning process. Mistakes can become valuable lessons in your journey with silicone rubber for mold making.
Choosing the Right Type of Silicone Rubber for Your Project
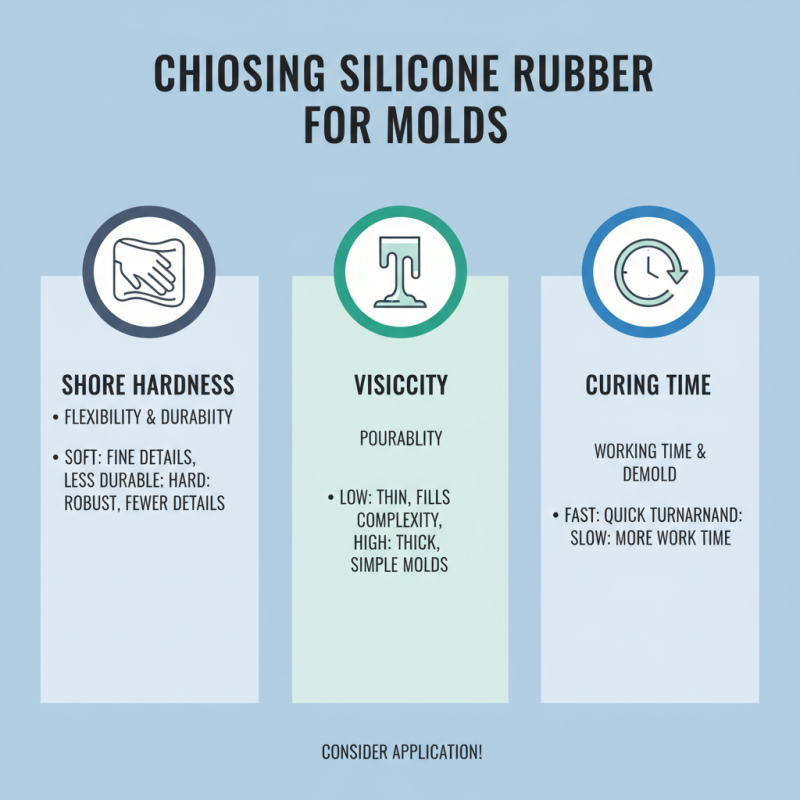
Choosing the right type of silicone rubber for your mold-making project is crucial. Different applications require specific properties. You need to consider shore hardness, viscosity, and curing time. Shore hardness determines the mold's flexibility and durability. A softer mold captures finer details but may wear out quickly.
Viscosity affects how well the silicone flows into intricate patterns. High-viscosity silicones are best for simpler designs. If you're working with detailed models, opt for a low-viscosity silicone. Additionally, the curing time is essential for your workflow. Fast-curing silicone can save time but may not be suitable for complex projects.
Test your choice on a small scale before proceeding. Mistakes can be costly and time-consuming. By practicing, you can identify the best fit for your needs. Your first choice may not always yield ideal results. Fine-tuning your selections can lead to better outcomes. Always document your process to improve future projects.
Preparing the Original Model for Mold Making with Silicone
Preparing the original model for mold making with silicone requires careful attention. Start by ensuring your model is clean and free of dust. Any particles can affect the mold quality. A smooth surface will yield better results, so spend time refining the model.
When applying mold release, follow the instructions carefully. This step is crucial to prevent the silicone from sticking to the model. Use a high-quality release agent. Even small mistakes can lead to problems during demolding. If you find that your model has undercuts, consider using a two-part mold method. This allows for detailed parts without compromising the shape.
Before starting, test your silicone on a small area of the model. This helps identify any potential reactions. Small imperfections can appear, but they can often be mitigated with some extra care. Don't rush the process; take your time to ensure every detail is captured. Each step matters in achieving a professional-looking mold.
Mixing and Pouring Silicone Rubber: Best Practices
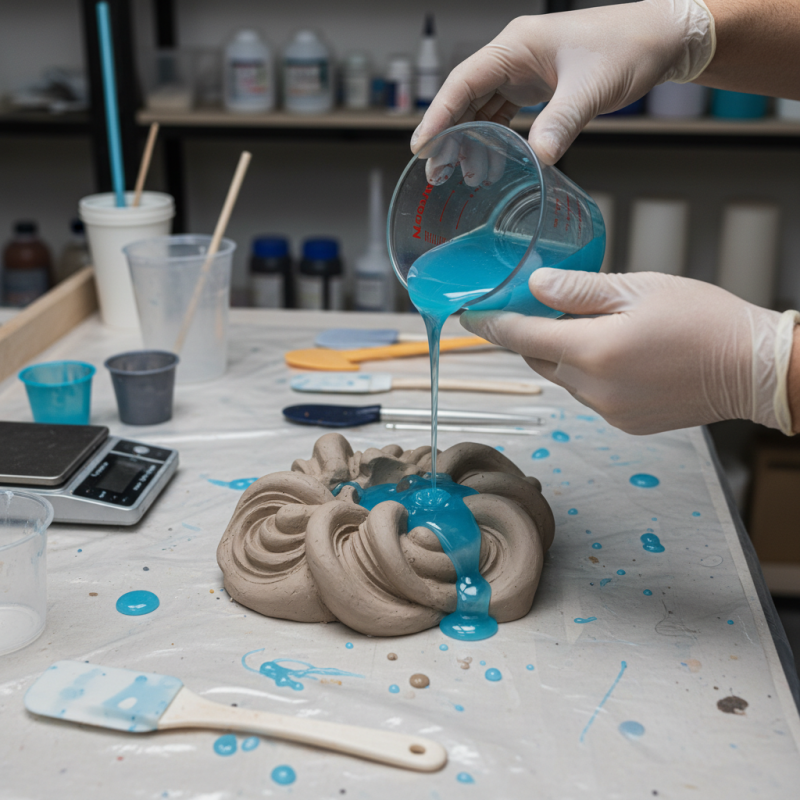
Mixing silicone rubber correctly is crucial for effective mold making. Always measure components precisely. Use a digital scale for accuracy. Mixing by weight often yields better results than by volume. Stir thoroughly to ensure an even blend. Watch for air bubbles that can form. These can weaken your mold and create imperfections.
Pouring silicone can be tricky. Aim for a slow and steady pour to minimize trapped air. Pour from one side of the mold to allow bubbles to escape. If you notice any bubbles forming, you might want to tap the mold gently. This can help release them. Sometimes, despite careful pouring, air bubbles persist. Learning from these mistakes will improve your technique.
Be mindful of the environment where you work. Temperature and humidity can impact the curing process. A cooler environment might slow your curing time. On the other hand, high humidity can introduce issues. Experimenting and tracking conditions can improve future projects. Every mishap can teach you something valuable. Embracing these challenges is part of the journey in silicone mold making.
10 Essential Tips for Using Silicone Rubber for Mold Making
| Tip Number |
Tip Description |
Best Practice |
| 1 |
Choose the Right Type of Silicone |
Select silicone that is compatible with your project requirements. |
| 2 |
Measure Accurately |
Use a digital scale for precise measurements of components. |
| 3 |
Mix Thoroughly |
Stir the silicone well to avoid inconsistencies. |
| 4 |
Control the Temperature |
Ensure that the working environment is at optimal temperature. |
| 5 |
Use a Vacuum Chamber |
Remove air bubbles from the mixture for a flawless finish. |
| 6 |
Work Slow |
Take your time while mixing and pouring to avoid mistakes. |
| 7 |
Invest in Quality Products |
Choose high-quality silicone for better results. |
| 8 |
Use Release Agents |
Apply mold release agents to facilitate easy de-molding. |
| 9 |
Cure Properly |
Follow manufacturer's instructions for curing times and conditions. |
| 10 |
Store Properly |
Keep unused silicone in a cool, dry place to extend shelf life. |
Curing Process: Ensuring Proper Hardening of Your Mold
When making molds with silicone rubber, the curing process is crucial. Proper hardening ensures your mold captures detail and lasts a long time. The curing time can vary based on the silicone used. Always refer to the technical data sheet for guidance. Inadequate curing might lead to a soft or tacky surface, affecting future use.
One tip is to measure your silicone and catalyst accurately. Under-measuring can result in incomplete curing. Mixing these components thoroughly is vital. Bubbles can form if not mixed well, which may compromise the mold's integrity. Consider using a vacuum chamber to remove trapped air, allowing for a smoother finish.
Another essential tip is to control the temperature and humidity during the curing phase. Too much moisture can interfere with the chemical reaction. Keep your work area dry and at a stable temperature for optimal results. Remember, not all silicone is the same. Testing small batches can help you understand its behavior. Reflect on any imperfections; they often offer the best learning experiences.
Silicone Rubber Curing Process: Essential Factors for Proper Hardening
Demolding Techniques: Safely Removing Your Silicone Mold
When working with silicone molds, understanding demolding techniques is crucial. Timing is essential. Wait for the silicone to cure fully before attempting to remove your mold. If you remove it too early, you risk damaging your piece and ruining your mold. Patience is key here, but knowing the exact curing time for your specific silicone is vital.
Applying a release agent can simplify the demolding process. A light coating can minimize sticking, but be cautious not to overapply. Too much release agent can lead to surface issues on your final piece. A common mistake is overlooking the importance of the mold's design. Intricate details may trap the cured material, making removal challenging. Always inspect your mold for undercuts or tight spots that could complicate demolding.
Finally, consider the use of gentle tools to aid in demolding. Rubber spatulas or wooden sticks can help leverage the mold without damaging it. However, be careful not to use metal tools that could scratch or harm the silicone. Reflecting on these techniques can save time and improve the quality of your work. Each step contributes to a smoother process and a successful outcome.