10 Best Rubberized Dip Coating Tips for Durable Protection and Finish
Rubberized dip coating has emerged as a leading protective solution across various industries, characterized by its ability to provide a resilient and aesthetically pleasing finish. According to a recent industry report by the Polymer Coatings Association, the rubberized dip coating market is projected to grow at a compound annual growth rate of 7.5% over the next five years, reflecting a surge in demand for durable coating solutions that can withstand harsh environmental conditions. This trend signifies the increasing recognition of rubberized dip coating as a vital tool in asset preservation and enhancement.
Expert in advanced coating technologies, Dr. Emily Carter, emphasizes its importance by stating, “Rubberized dip coating not only enhances the longevity of products but also provides an added layer of protection against wear and tear.” As industries continue to evolve, understanding the best practices for applying rubberized dip coating becomes essential for achieving optimal results. This article aims to explore the top ten tips for utilizing rubberized dip coating effectively, ensuring that both durability and a high-quality finish are attained. By leveraging these insights, professionals can better safeguard their investments against environmental degradation and enhance the overall performance of their products.
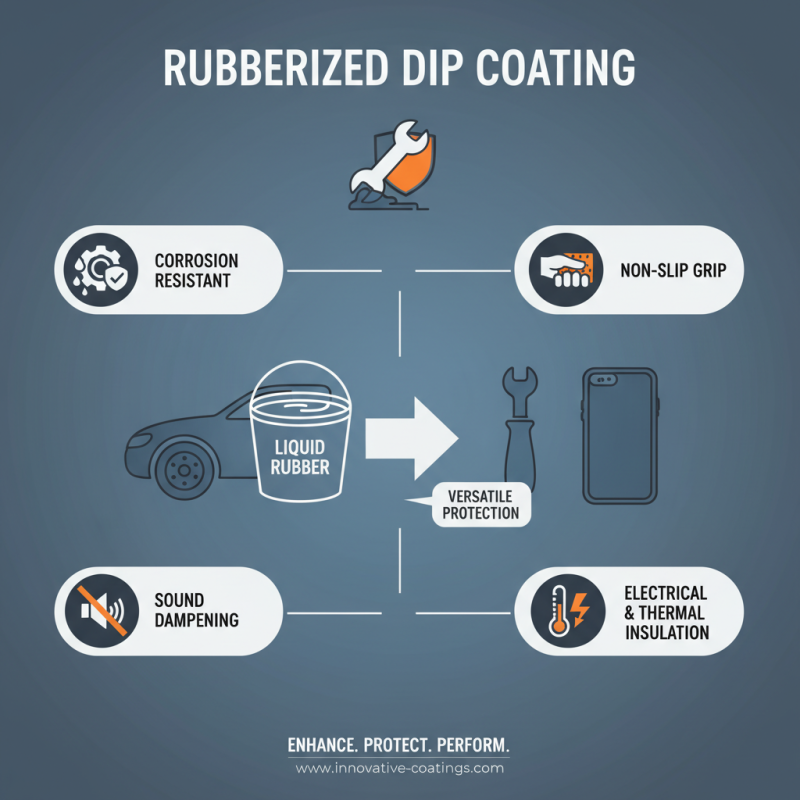
What is Rubberized Dip Coating and Its Benefits
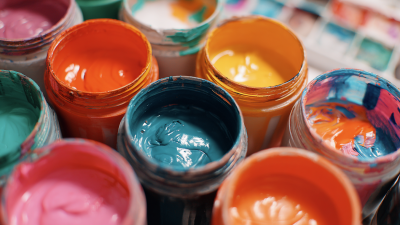
Rubberized dip coating is a versatile protective finish that involves immersing an object into a liquid rubber material, allowing it to coat the surface evenly. This innovative technique creates a durable layer that enhances both the object’s functionality and aesthetic appeal. The rubberized finish is particularly valued for its ability to resist corrosion, provide a non-slip surface, and mitigate sound. Additionally, it offers excellent insulation properties, making it suitable for a wide range of applications, from automotive parts to household items.
One of the primary benefits of rubberized dip coating is its adaptability. The application process can vary significantly depending on the desired outcome, which allows for customization in terms of thickness, texture, and color. This flexibility not only caters to specific needs but also ensures that a superior protective finish is achieved. Furthermore, the dip coating process simplifies application, as it can cover complex shapes and hard-to-reach areas that traditional methods might miss. As a result, rubberized dip coating stands out as an effective solution for anyone looking to enhance the durability and appearance of their items.
Essential Tools and Materials for Rubberized Dip Coating
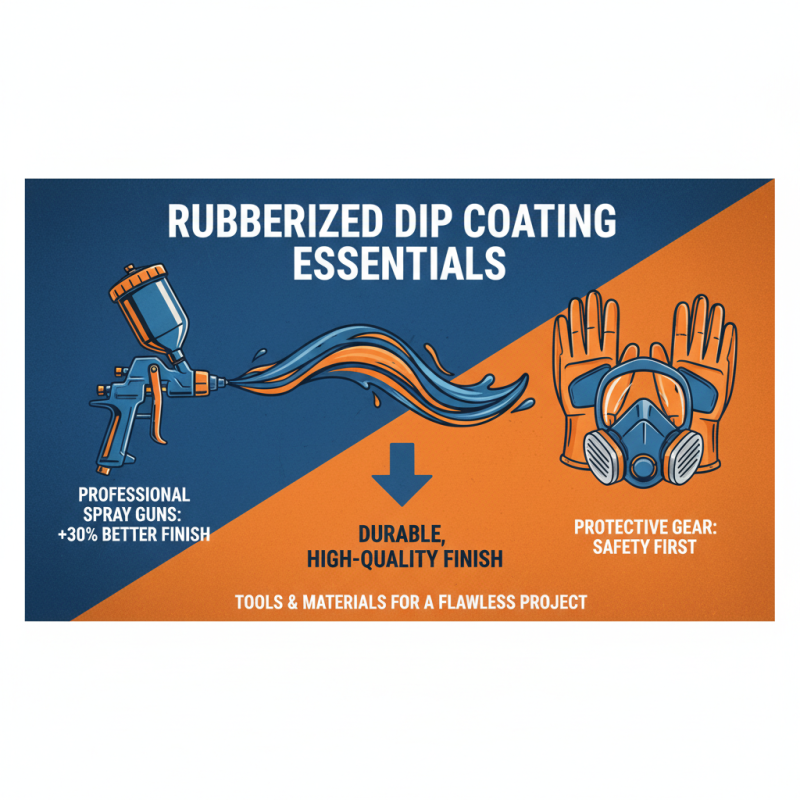
When embarking on a rubberized dip coating project, having the right tools and materials is crucial for achieving a durable and high-quality finish. Essential tools include spray guns, which offer precision and ease of application, and protective gear such as gloves and masks to ensure safety during the process. According to industry reports, using professional-grade spray guns can yield a 30% better finish compared to standard options, underscoring the importance of investing in quality equipment.
In addition to tools, selecting the appropriate materials is key. Rubberized coating compounds come in various formulations tailored for specific applications, such as automotive or industrial use. It’s recommended to utilize a primer before applying your coating, as this can enhance adhesion and longevity; data indicates that projects using a primer have shown a 25% increase in coating lifespan.
Tip: Always prepare the surface by cleaning and lightly sanding it to promote better adhesion. Another crucial tip is to apply several thin layers of the rubberized coating rather than one thick layer, as this helps avoid drips and ensures a smooth finish. Following these guidelines will not only improve the performance of your coating but also extend its life, maximizing your investment in both time and materials.
Step-by-Step Preparation for Rubberized Dip Coating Application
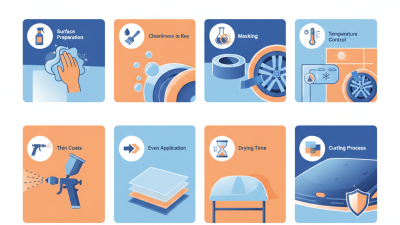
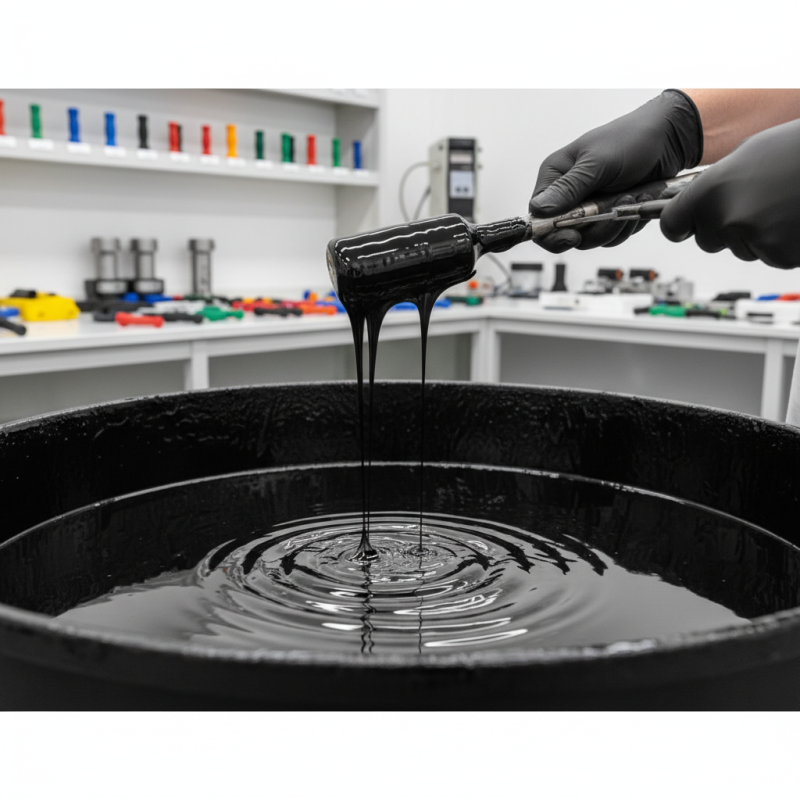
Preparing for a rubberized dip coating application involves several critical steps to ensure a durable finish that adheres properly to the surface. First and foremost, selecting the right surface for coating is essential. Clean the item thoroughly, removing any dirt, grease, or existing coatings that may interfere with adhesion. Using a degreaser or a mixture of mild soap and water can effectively prepare the surface. For metal items, sanding or scuffing the surface with fine-grit sandpaper will enhance grip, allowing the rubberized coating to bond more effectively.
Once the surface is prepped, it’s crucial to plan the application environment. Choose a well-ventilated area and protect surrounding surfaces to shield them from overspray. If applicable, masking tape can be used to delineate areas you don’t want coated. When applying the rubberized dip, apply even coats and follow the recommended drying times between layers. This step-by-step preparation is vital to achieving a robust and aesthetically pleasing finish, ensuring that your coated items are not only stylish but also well-protected against wear and tear.
Techniques for Achieving a Smooth Finish with Rubberized Coating
Achieving a smooth finish with rubberized coatings requires careful preparation and application techniques. The first essential step is to ensure that the surface to be coated is thoroughly cleaned and free from any dust, grease, or old paint. A rough surface can lead to an uneven application and diminish the final appearance. Sanding the surface lightly can create a better grip for the coating. After cleaning, make sure to dry the surface completely before proceeding to the next step.
When applying the rubberized coating, using a quality sprayer rather than a brush or roller can contribute significantly to a smoother finish. Spraying allows for a more even distribution of the material, reducing the likelihood of streaks or bubbles. It’s also important to apply the coating in thin, uniform layers, allowing adequate drying time between applications. This technique not only enhances the durability of the finish but also ensures a smoother texture. Adjusting the air pressure during spraying can also help in achieving an ideal finish, as it controls the flow and atomization of the coating, which directly impacts the final result. Proper technique and patience during application will lead to a professional-looking finish with your rubberized coating project.
Common Mistakes to Avoid When Using Rubberized Dip Coating
When using rubberized dip coating, avoiding common mistakes can significantly enhance the durability and finish of your projects. One frequent pitfall is inadequate surface preparation, which is crucial for ensuring optimal adhesion. According to industry studies, improper surface cleaning can reduce the bond strength by up to 50%, leading to premature peeling or flaking. Always ensure that surfaces are clean, dry, and free of any dust, grease, or oils before applying the coating to maximize performance.
Another common error is applying the coating too thickly in one go. While it might seem efficient, thick layers can trap air and moisture underneath, compromising the overall integrity of the finish. Experts recommend applying multiple thin coats instead of a single heavy one. This helps achieve a uniform application, facilitating quicker drying and curing times. For instance, a study published in the “Journal of Coatings Technology” found that multi-layer applications can improve long-term durability by extending the lifespan of the coating by nearly 30%.
Finally, overlooking the curing process commonly leads to less than ideal results. Each rubberized dip coating has its specific curing time, and rushing this step can result in a finish that lacks the desired toughness. It is essential to adhere to the manufacturer's guidelines on drying and curing times. For best results, keep the coated items in a dust-free environment during the curing phase, as contaminants can mar the finish and reduce its protective qualities.