2026 How to Apply Rubberized Dip Coating for Maximum Protection?
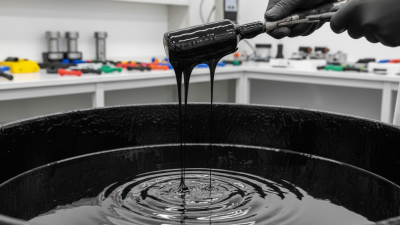
Rubberized dip coating offers a strong layer of protection for various surfaces. Many people underestimate its potential benefits. This protective method involves immersing objects into a liquid rubber solution, creating a durable barrier. It’s perfect for tools, electrical components, and even household items.
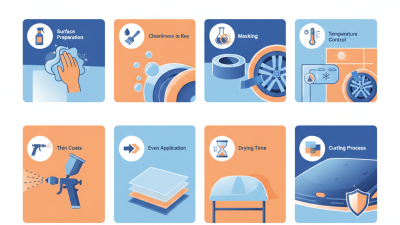
Applying rubberized dip coating is not as straightforward as it seems. Preparation is key to achieving a smooth finish. Surfaces must be clean and free from any debris. However, mistakes often happen during the prep phase. Many rush this crucial step, leading to poor adhesion later on. To ensure maximum protection, patience is essential.
Another common oversight is the application technique. Overlapping strokes can lead to uneven coverage. Spraying too thickly can cause drips and runs. Monitoring the drying time is vital, but many skip this and compromise the overall quality. Understanding these nuances is crucial for anyone looking to use rubberized dip coating effectively. Embracing these details can elevate your project’s outcome significantly.
Materials and Tools Needed for Rubberized Dip Coating
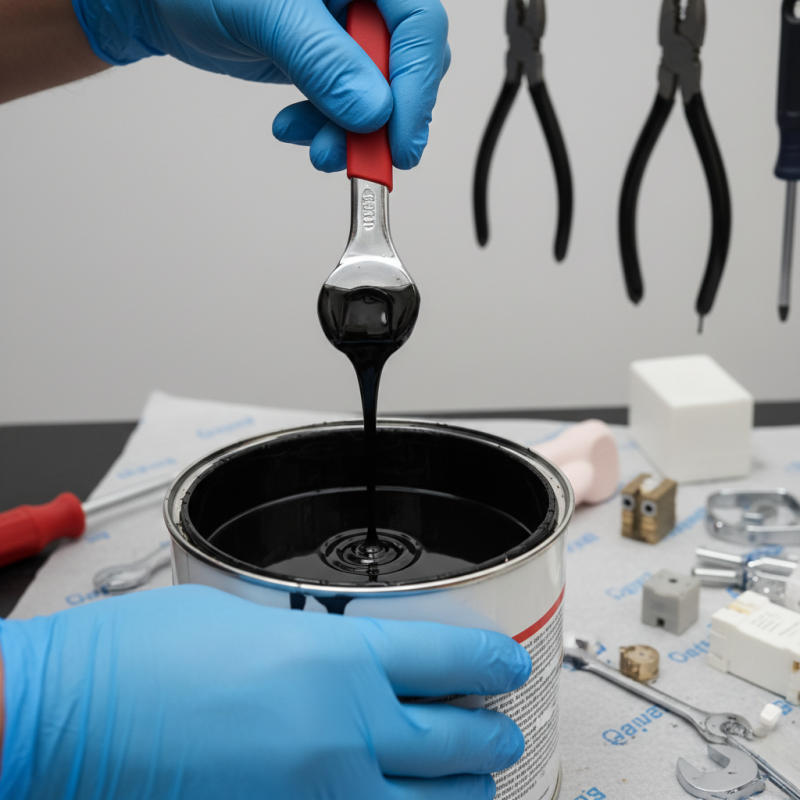
Rubberized dip coating is a popular method for providing protective layers on various objects. To get started, you will need several materials and tools that are essential for an effective application. Key materials include a rubberized coating, typically solvents-based or water-based. The coating should have properties that allow for flexibility and resistance to abrasion. According to industry studies, rubberized coatings can enhance the lifespan of products by up to 50%.
You will also need tools such as gloves and safety goggles for protection during application. An applicator or dipping basket can ensure an even coating. It’s important to prepare the surface of the object to enhance adhesion. Surface contamination can lead to poor results. A rougher surface often provides better grip for the coating.
While dipping, it’s crucial to maintain a steady hand. Uneven dips can leave blotches or thin spots. The coating should have an adequate drying time; rushing this step can impact the durability. The application process can be messy, so a well-ventilated area is necessary. Even with precaution, overspray can occur, leading to unwanted areas needing touch-up. Therefore, patience and precision are your best friends.
2026 How to Apply Rubberized Dip Coating for Maximum Protection? - Materials and Tools Needed for Rubberized Dip Coating
| Material/Tool |
Purpose |
Recommended Specifications |
| Rubberized Dip Coating |
Protective layer for various surfaces |
Flexible, waterproof, durable |
| Spray Gun |
Application tool for even coating |
Compatible with dip coating products |
| Masking Tape |
Protect areas from coating |
High adhesion, easy removal |
| Drop Cloth |
Protects surrounding surfaces |
Waterproof, large coverage |
| Safety Gloves |
Personal protection during application |
Chemical resistant, non-slip |
| Respirator Mask |
Protects from inhaling fumes |
Filters organic vapors, snug fit |
| Paintbrush |
Detailed application in tight areas |
Various sizes, synthetic bristles |
| Thinner (if applicable) |
Adjusts viscosity for application |
Recommended by coating manufacturer |
Surface Preparation Steps for Effective Coating Application
Surface preparation is crucial for applying rubberized dip coating effectively. Start by cleaning the surface to remove dirt, oil, and grease. A simple cloth or cleaner can make a difference. Make sure to inspect for rust or corrosion. These issues can prevent the coating from adhering properly.
Once the surface is clean, sanding may be necessary. Use sandpaper to create a rough texture. This helps the coating grip better. Pay attention to areas that may be overlooked. Even small spots can affect the overall finish. After sanding, wipe the surface with a clean cloth. Any residue left can cause problems later.
Proper drying is essential before applying the coating. Avoid working in humid conditions. If the surface isn’t dry, the coating may bubble or peel. It’s important to remember that every step matters. Skipping a detail can lead to issues in durability. Each project is a chance to learn and improve techniques. Always assess what could be done better next time.
Techniques for Applying Rubberized Dip Coating Evenly
Rubberized dip coating offers excellent protection. To apply it evenly, preparation is key. Clean the surface thoroughly. Remove any dirt and grease. A clean surface helps the coating adhere better.
When dipping, use smooth and steady motions. Avoid quick dips; they can cause uneven layers. Submerge the item fully, but do not rush. A slow pull-up will let excess coating drip off evenly. Ensure the coating forms a consistent layer. Watch for any drips or uneven spots.
Sometimes imperfections happen. Bubbles may form; they need attention. Inspect the coating after it dries. If there are flaws, don’t worry. Sanding the surface lightly can correct them. Practice makes perfect, so don’t hesitate to try again. Each attempt teaches valuable lessons.
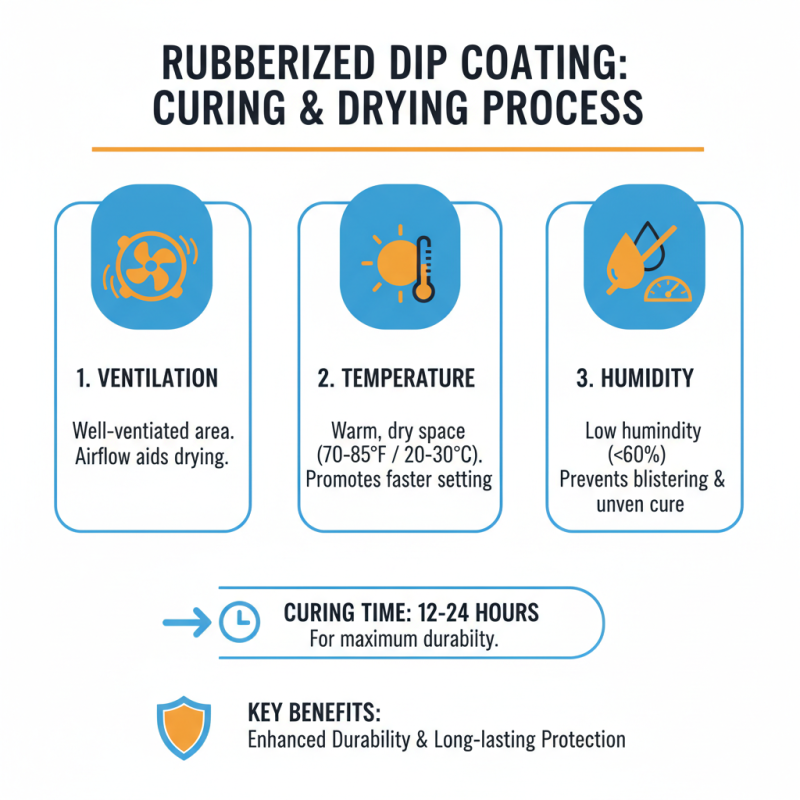
Curing and Drying Process for Enhanced Durability
When applying rubberized dip coating, the curing and drying process is crucial for achieving maximum protection. Proper techniques ensure enhanced durability and long-lasting results. Start by allowing the coated item to cure in a well-ventilated area. Temperature and humidity play important roles. A warm, dry space will help the coating set effectively.
Tips: Consider using a fan to improve airflow. This speeds up the drying process. Don’t rush. Rushing can lead to an uneven finish. A uniform cure is essential for durability.
After applying the dip coating, you should wait at least 24 hours for it to dry. However, some coatings may require longer. Check the product instructions for specific guidance. If the coating feels tacky, give it more time. Be aware of environmental factors that can affect the curing.
Tips: Avoid damp conditions, as they hinder drying. Test the hardness gently with your fingers to ensure it has cured completely. If it doesn’t feel right, reconsider your drying environment. Remember, achieving the perfect coating can take practice and care. Embrace the learning process.
Maintenance Tips for Long-lasting Rubberized Coated Surfaces
Rubberized dip coating provides excellent protection, but proper maintenance is crucial. Regular cleaning is essential to maintain the surface's integrity. Use mild soap and water for routine cleaning. Avoid abrasive materials, as they can damage the rubberized coating. For deeper stains, a soft brush works well.
Inspect the coated surfaces periodically. Look for any signs of wear or damage. Small scratches or chips need attention. If left unchecked, they can worsen over time. Addressing these issues early can save time and effort in the long run.
Consider applying an additional coat if the surface appears dull or worn. This can rejuvenate its appearance and restore protection. Remember that rubberized coatings can fade with exposure to sunlight. Keeping surfaces out of direct sunlight will extend their lifespan. Always be mindful of environmental conditions that may affect your coating’s durability.