2025 How to Apply Plastic Dip Coating for a Durable Finish
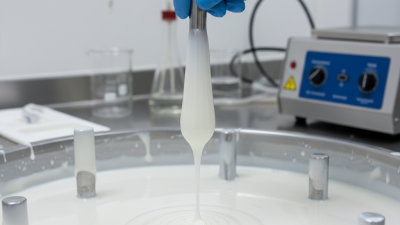
In the ever-evolving world of coatings, "plastic dip coating" has emerged as a popular choice for those seeking a durable and versatile finish. According to industry expert Dr. Emily Carter, a leading authority in surface treatments, "Plastic dip coating not only provides exceptional protection but also enhances the aesthetic appeal of various substrates." This transformative process involves applying a liquid rubber coating that creates a flexible barrier, protecting surfaces from scratches, corrosion, and wear over time.
As we progress toward 2025, understanding the applications and benefits of plastic dip coating becomes increasingly vital for both professionals and DIY enthusiasts. Whether you're looking to revamp automotive parts, tools, or household items, mastering the technique can yield impressive results. In this guide, we will explore the essential steps to effectively apply plastic dip coating, ensuring a reliable finish that stands the test of time and enhances the performance and appearance of your projects. Join us as we uncover the secrets to achieving a flawless application and the longevity that plastic dip coating promises.

Understanding Plastic Dip Coating and Its Benefits
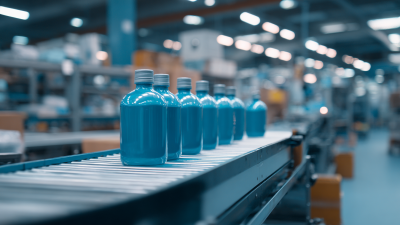
Plastic dip coating has emerged as a versatile and effective finishing technique widely used across various industries. This soft, rubber-like coating not only provides a visually appealing look but also serves as a protective layer that enhances durability. One of the primary benefits of plastic dip coating is its resistance to environmental stressors, such as moisture, chemicals, and temperature fluctuations. According to a report by the Coatings Research Group, the global market for protective coatings such as plastic dips is expected to grow at a compound annual growth rate (CAGR) of 5.2% from 2022 to 2027, indicating a significant demand driven by the need for enhanced product durability.
Additionally, plastic dip coating is known for its flexibility and adhesion properties, allowing it to be applied to a variety of surfaces. This adaptability makes it an ideal choice for both consumer goods and industrial applications. A study from the American Coatings Association highlights that coatings that offer both aesthetic appeal and functional performance, such as plastic dip coatings, are increasingly favored in modern manufacturing processes. Users can benefit from having a finish that not only looks good but also shields against wear and tear.
Tips: When applying plastic dip coating, ensure the surface is thoroughly cleaned and primed for optimal adhesion. Start with thinner coats, allowing each layer to dry completely before applying the next to achieve a smooth, even finish. Remember to conduct a test on a small area first to determine compatibility and desired appearance.
Preparing Surfaces for Effective Plastic Dip Application
When applying plastic dip coating, the preparation of surfaces is crucial for achieving a durable and effective finish. According to the latest market reports from industry experts, properly prepared surfaces can significantly enhance the adhesion of the coating, reducing the likelihood of peeling or chipping over time. A study found that surfaces with a clean, roughened texture can increase the bonding strength by as much as 50%, underscoring the importance of surface preparation in coating applications.
To prepare surfaces for effective plastic dip application, begin by thoroughly cleaning the area. This involves removing dirt, grease, and old paint using suitable cleaners or solvents. A clean surface not only promotes adhesion but also prevents imperfections in the coating. Following this, you should consider sanding the surface lightly to create micro-abrasions, which provide additional grip for the coating. Industry protocols suggest using a 320-grit sandpaper for optimal results. After sanding, ensure to wipe down the area again to eliminate any dust or particles that could interfere with the application process, ultimately leading to a longer-lasting and more resilient finish.
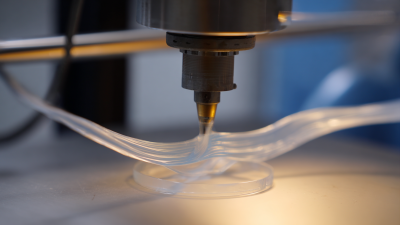
Step-by-Step Process for Applying Plastic Dip Coating
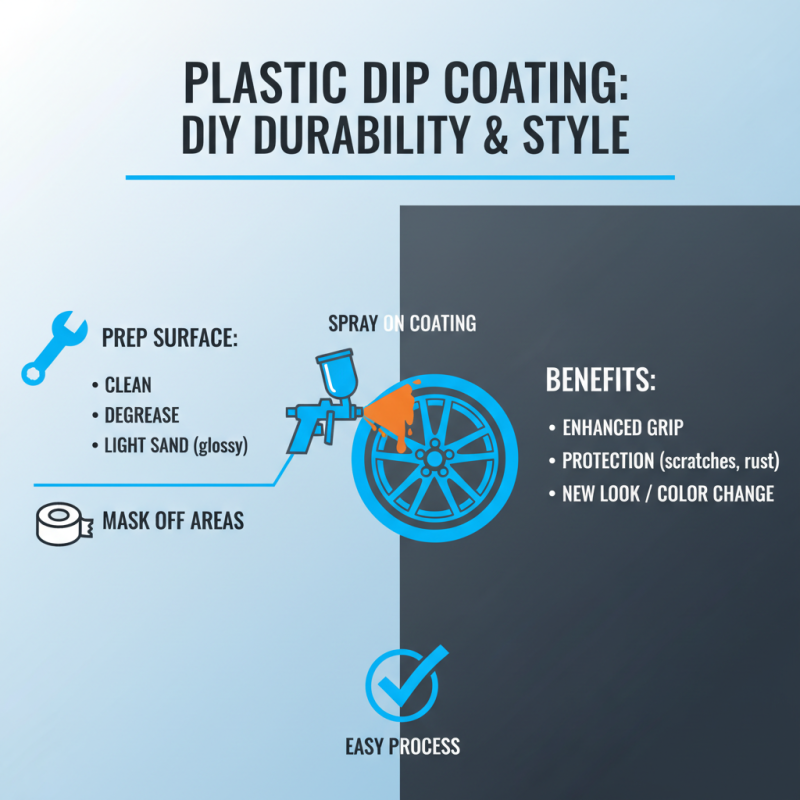
Applying plastic dip coating is a straightforward process that can enhance the durability and appearance of various surfaces. To begin, ensure that the area you are working in is clean and well-ventilated. Start by preparing the surface you intend to coat; this includes cleaning it thoroughly to remove dirt, grease, and old paint. If the surface is polished or glossy, lightly sand it to promote adhesion. After cleaning, use masking tape to protect areas you do not wish to coat.
Once you have prepared the surface, it’s time to apply the plastic dip coating. Shake the container well before use to ensure an even consistency. Hold the spray nozzle at a consistent distance from the surface—typically around 6 to 12 inches—and apply in even, sweeping motions. Begin with a light coat, allowing it to dry fully before adding additional layers. It’s generally recommended to apply at least two to three coats for optimal durability, with drying time between each layer as indicated in the product instructions. After the final coat has dried, carefully remove any masking tape to reveal a clean, professional finish.
Curing and Finishing Techniques for Optimal Durability
When applying Plastic Dip coating, achieving a durable finish goes beyond the initial application; it’s crucial to focus on the curing and finishing techniques that enhance longevity. After applying the coating, allow it to cure in a well-ventilated area, as this ensures that the chemicals evaporate effectively, providing a robust bond for the finish. The ideal curing temperature is between 60°F and 90°F, as this range promotes optimal adhesion and durability. Patience is key—allow the coating to cure for at least 24 hours before exposing it to moisture or heavy use.
To further improve the durability of your Plastic Dip finish, consider implementing a proper finishing technique. After the initial curing process, inspect the coating for any imperfections, such as bubbles or uneven surfaces. Smooth out these areas gently with fine sandpaper before applying a final coat. This not only enhances the visual appearance but also strengthens the overall integrity of the coating.
Tips for best results: Always work in thin layers to avoid runs and drips. If you notice the appearance of small bubbles during application, gently pop them with a pin or allow the coating to settle for a few moments before continuing. Additionally, protect the coated surface from direct sunlight and extreme temperatures during the drying phase to ensure a flawless and lasting finish.
2025 How to Apply Plastic Dip Coating for a Durable Finish
Common Mistakes to Avoid When Applying Plastic Dip Coating
When applying a plastic dip coating, avoiding common mistakes can significantly enhance the durability and appearance of the finish. One of the most frequent errors is not properly preparing the surface before application. According to industry reports, a clean, dry substrate is crucial, as contaminants like dust and grease can compromise adhesion, leading to peeling or chipping. Take the time to thoroughly clean the surface and allow it to dry completely, as surfaces that are too wet can affect the performance of the coating.
Another significant mistake is applying the coating too thickly. Industry guidelines recommend applying multiple thin layers rather than one thick coat, as thicker layers are more prone to running or sagging, resulting in an uneven finish. Data from recent studies indicate that a build-up of more than 6 mils can lead to problems such as cracking or premature wear. Typically, 4-5 light coats, with adequate drying time between each, provide a superior, long-lasting finish. Observing proper misting technique and environmental conditions, such as temperature and humidity, can further enhance the application process, ensuring a professional-grade result that stands the test of time.